
"Shine Online"
Recurring Subscriptions
A recurring subscription allows you to charge customers on a repeated schedule for products and services.
You can offer subscriptions and accept recurring payments for one or more items. The billing cycle can be set to daily, weekly, biweekly, monthly, quarterly, or annually. With recurring subscriptions you can sell food, daily products, cosmetics, subscription boxes, access to membership, accept regular donations, and more.
NOTE
This feature is available on Advanced and Unlimited Stores.
You need the Stripe payment method to set up recurring subscriptions, and therefore subscription settings will only display for those countries where Stripe is available.
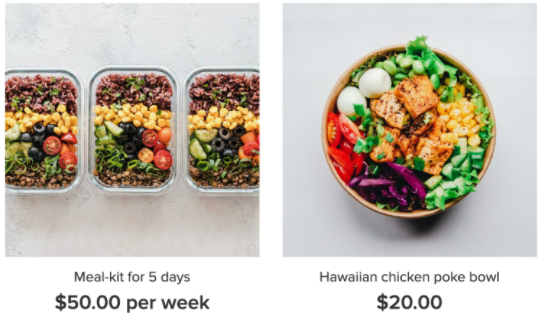
Customers will see a price along with a period of the subscription in your StoreFront (a period is displayed for items with subscription only. If an item has an option for a one-time purchase, a subscription period will be displayed on the product details).
To enable subscriptions in your store, you should connect the Stripe payment method. After that, buyers can pay with a debit or credit card. Once they subscribe to your product, they will be charged automatically according to the subscription period. Customers can manage subscriptions in the customer account — cancel it or change payment details.
Customers can have more than one subscription in your store. Items must have the same subscription interval, so a customer could add them both to the cart. For instance, a lunch-kit for a week and a craft beer box for a week. If products have different subscription intervals, or if one of the products doesn’t have a subscription option, a customer can order them separately.
If a customer pays for the shipping, they will be charged for it every time during the subscription. For instance, a customer subscribed to a $10 shampoo. Shipping cost is $5. So they pay $15 for the order. Next quarter, a customer should get another shampoo bottle, and they will be charged $15 — exactly the same sum they paid you the first time.
Once the order is made, you will receive an email with subscription details. Every time a customer is charged during the subscription period, you will receive an email and a new order will be placed automatically. You will also receive an email if the subscription is canceled or if there is an issue with charging.
If you change the price of the subscription, new customers will be charged with the new price. The price won't change for customers who subscribed before the price changed.
If your product has different options and a customer subscribed for a particular one, they will be subscribed to that particular product variation. If a customer changes their mind and decides they want to get products with another flavor, color, etc., they will have to cancel the current subscription and re-subscribe to another product variation.
To manage subscriptions, go to the Store Control Panel, click My Sales, and click Subscriptions. In your Subscription page, you will see all the subscriptions — there are four types in total, including active, canceled, subscriptions with failed charge, and ones that need payment confirmation.
Add Recurring Subscriptions
To start selling your items regularly, you need to enable the subscription option in your store and add products with the subscription pricing.
Before you proceed with setup, make sure that your store meets the requirements:
- Connect Stripe as a payment method. For more information, see About Payment Options.
- Include rules for using recurring subscriptions in your store’s Terms & Conditions. For example, the refund policy, delivery details, and so on. For more information, see Legal Pages.
Make sure to include information about payment terms, non-refundable fees, restrictions on use, termination of subscriptions.
To add recurring subscriptions:
- In the side panel of the editor, click eCommerce, and then click Manage Store.
- Click Settings, click General, and then click Cart & Checkout.
- Scroll to the Subscriptions section, and complete the following:
- Allow Subscriptions. Enable the Allow Subscriptions toggle to enable products with subscription prices.
- Payment Method. If you have not previously added the Stripe payment gateway, click Set Up Stripe.
- Subscription Products. To create new subscription products, click + Create subscription product. To sell existing products with recurring payments, see Enable Existing Products for Subscriptions.
- Terms & Conditions. Click Go to Terms & Conditions to add or edit the Terms & Conditions document.
4. Click Save.
Now your customers can subscribe to your products. With every new charge, your inventory will be updated automatically.
NOTE
You can specify the shipping method for a product with recurring subscriptions. For example, if you want to deliver only with local delivery, or only with a particular postal service.
Enable Existing Products for Subscriptions
To sell existing products with recurring payments:
- In the side panel of the editor, click eCommerce, and then click Manage Store.
- Click Catalog, and then click Products.
- Next to the product you want to enable for recurring subscriptions, click Edit Product.
- In the Pricing section, click Manage Pricing Options, and enable the Sell by subscription toggle.
- A Billing Period field appears. Click the drop-down and select how often you want to charge your customers for this product.
- Select Allow purchase without subscription to allow customers to choose between one-time purchases and subscriptions. Otherwise, they can only buy a product with a subscription.
- Click Save.
Manage Subscriptions
To manage subscriptions, in the side panel of the editor click eCommerce, and then click Manage Store. Click My Sales, and then click Subscriptions. You will see all subscriptions your store ever had, including active, canceled, subscriptions with failed charges, and the ones that need to be confirmed.
To make it easier to find the subscription you are looking for, click Filter and select how you want subscriptions to be displayed. This can help you prioritize your order processing. For instance, you can click Filter → Next Charge Date and select Next 7 days. That way you will see what subscription products need to be prepared and shipped first.
You can also check all the orders that were made within one subscription. For instance, a customer subscribed to one cosmetic box once per month, one hair treatment box once per month, and one shaving set once per month. If you want to see all orders within a subscription, go to My Sales → Subscriptions, find the subscription and click Orders created: 3 orders. You will see all orders that were made within the subscription.
While processing an order, you can change its status, edit the order, or print an order in My Sales → Orders.
Contact Customers
In case you need to specify the delivery address or clarify subscription details, you can always contact your customer in person via email.
To find your customer’s email or phone, in the Store Control Panel, click My Sales, and then click Subscriptions, find the subscription you have issues with, and look up the email of a customer to contact them.
Edit Automated Emails
Customers that subscribed to your products can receive automated emails if payment confirmation is required, if a charge has failed, or if the subscription is canceled. You can edit the email templates for these automated emails — change the appearance and texts. For instance, change font color to your brand’s colors, change the paragraph’s order, add image, and more.
To edit email templates for subscriptions:
- In the side panel of the editor, click eCommerce, and then click Manage Store.
- Click Settings, and then click Notifications.
- Click
Edit
next to one of the templates you want to change:
Subscription Canceled, Subscription Charged Failed, or
Subscription Payment Confirmation is Required.
To disable an automated email, click the toggle next to the email you want to disable. - Make the required changes.
- (Optional) To preview the changes, click Preview Template.
- (Optional) To send a test email to the admin account, click Send test email.
- If you don’t like the result, click Revert to default at the bottom of the template to restore the default template.
- Once you are satisfied with the result, click Save.
For more information, see Email Notifications.
Cancel Recurring Subscriptions
A subscription can be canceled in three cases — if you cancel the subscription manually, if a customer cancels their subscription manually, or if a charge can’t be made (not enough money on a credit card or the card period has expired). The subscription will be canceled within 7 days if a customer won’t add a valid card to their account.
To manually cancel a subscription:
- In the side panel of the editor, click eCommerce, and then click Manage Store.
- Click My Sales, and then click Subscriptions.
- Select the subscription you want to cancel and click Actions, and then click Cancel subscription.
After canceling the subscription, orders will no longer be placed automatically, and the customer won’t be charged any further.
Recurring Subscriptions for Customers
Here’s how recurring subscriptions work for your customers:
- Once in your store, customers will see what products you sell with recurring subscriptions. A price will be displayed along with a period of the subscription. For example,
$50 per week.
2. If a product has two ways of collecting payments, a customer can choose to buy only once, or subscribe.
3. Once an order is placed, a new account for a customer will be created automatically in your store (if a person hasn't already created an account). A customer will receive an email with the subscription details and a link to log in to the customer account.
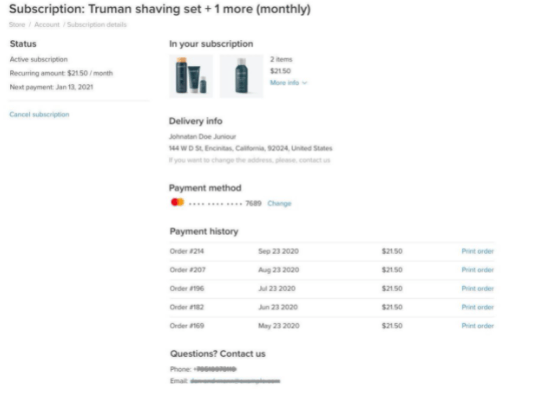
4. Customers can log in to their account and manage their subscriptions by changing card details, cancel subscriptions, and check the delivery address. They will also see their payment details, payment history, and your store contacts.
Register for 805 Reviews. Get your business listed for FREE. Promote your event, business, deals, and much more. This is a mobile APP and Website that is a MUST HAVE


TERMS OF SERVICE
PRODUCTS / SERVICES
COMPANY INFORMATION
COMPANY RESOURCES
PRODUCT
LINKS

We are San Luis Obispo County's and Santa Barbara County's premier website designer. We provide businesses affordable and creative website design.
How is YOUR business found online?
*unlimited FREE connections to your website when purchased together with any Econcept website